Get started with the network editor
Once you have created a new project, let's learn how to use the main interface in building your project schedule - the network editor. The network editor offers an 'infinite' canvas with a floating menu bar that offers a host of features to quickly build and navigate through your project schedule.
Need help?
Just contact us via the contact form below and we'll be happy to assist you.
Learn about the menu options

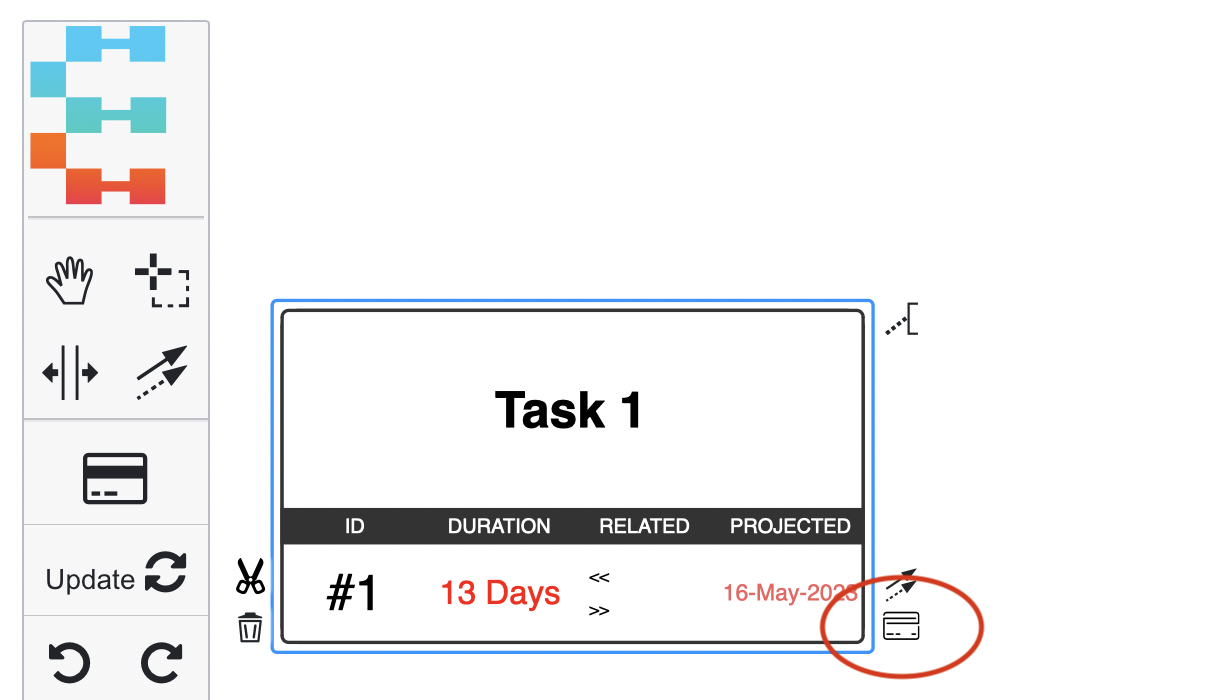
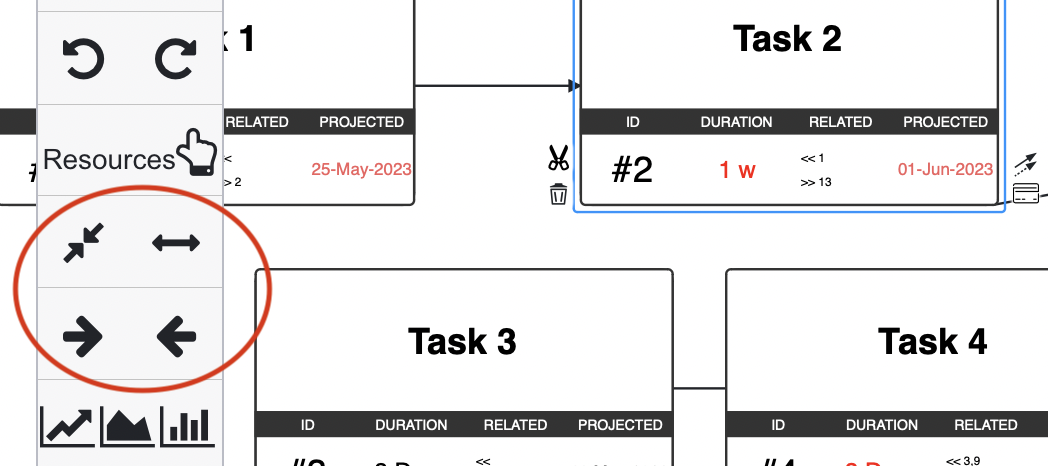
The menu
Click on the image to learn more about the various features available. The basic description is listed below.
Learn about the the task box

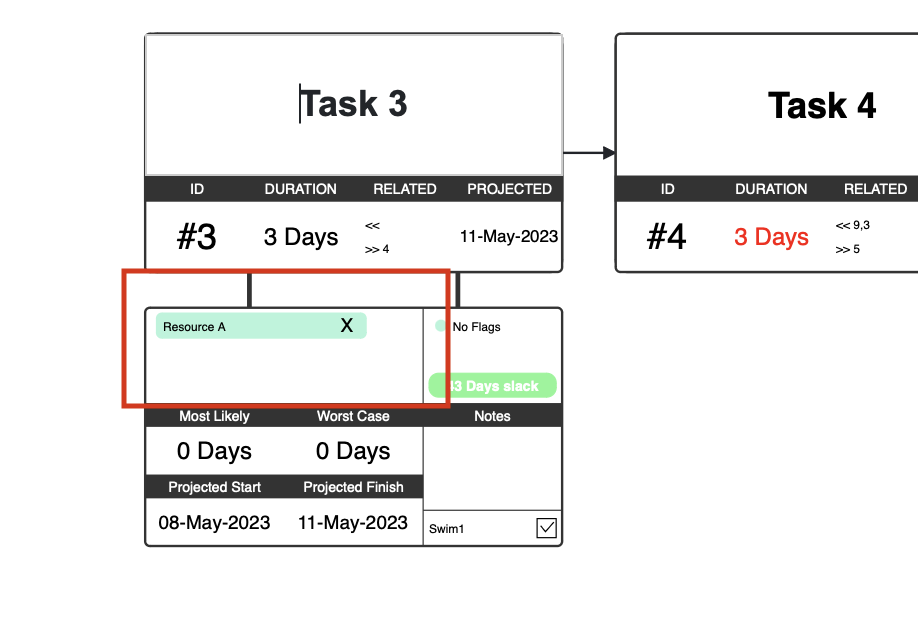
The task details box
Click on the image to learn more about the task details.
How do I use the network editor to create a schedule?
Click on the project's name on the projects dashboard to open the network editor
That should open a blank network editor canvas with a floating menu. Familiarize yourself with the menu options above.

Add a task
There are three ways you can add new tasks to the project;
Each task has a number of information fields, the basic need for any task is to add a brief description of the task and the duration of the task (think of this duration of the best case duration).
Add additional tasks
The third way to add tasks .
Add a few additional tasks and try few different types of durations for these tasks; standard duration nomenclature works in all duration fields.
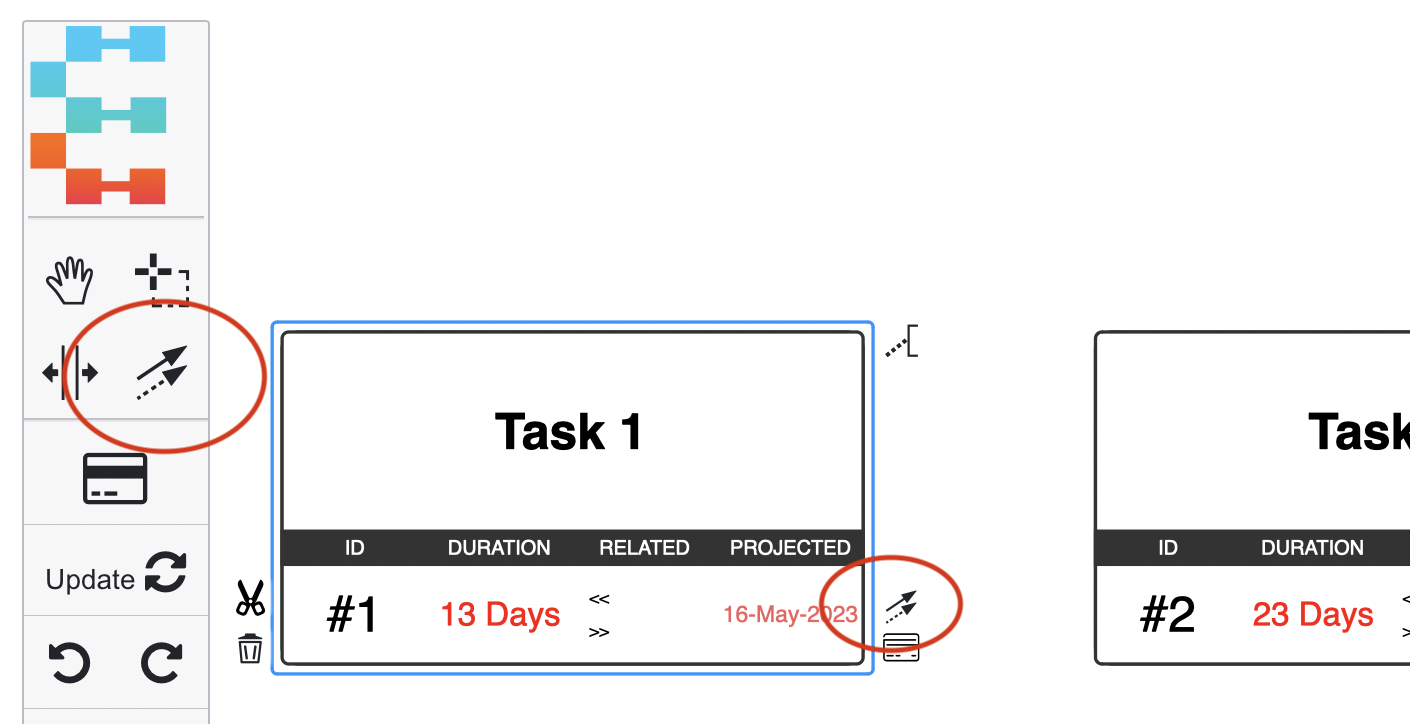
Setup Relationships between tasks
To establish a relationship between tasks you can use the "connect tool". There are two ways to use the connect tool.
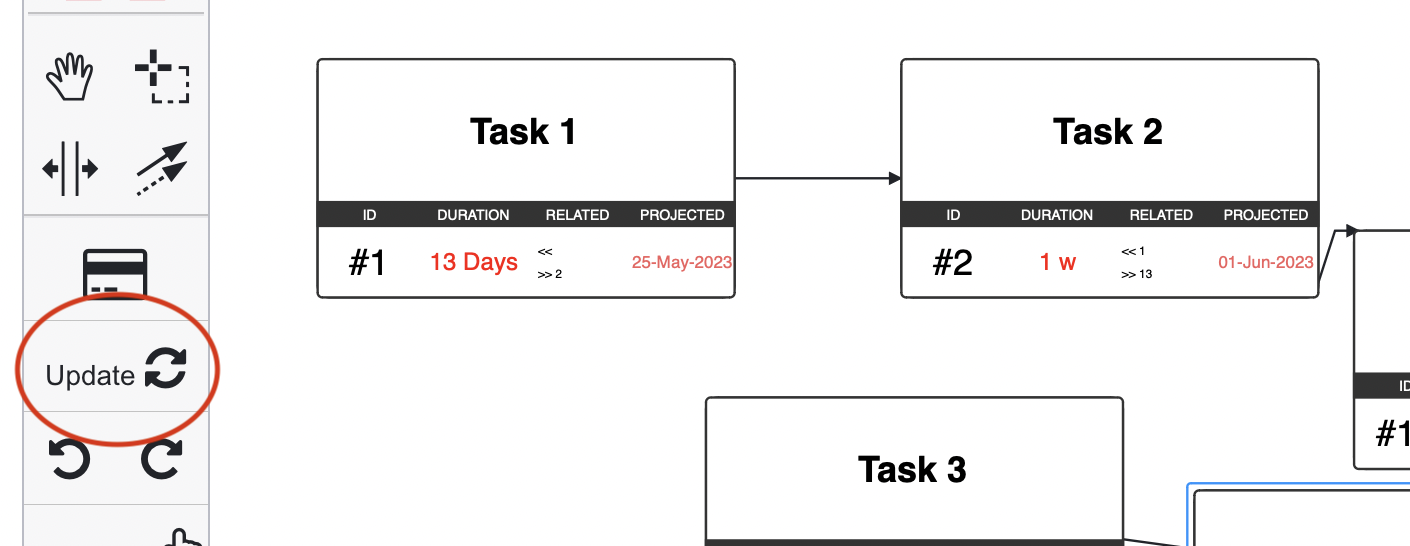
Sync/Update the project
When you have created the project schedule/network, click on the update button; this will run various algorithms to calculate the projected start/end dates for all your tasks, calculate appropriate buffers for your project and refresh the page to provide you the latest insights.
The algorithms will use the project start date as the initial date from which all the remaining timings are established. Once the page refreshes, you'll see certain tasks where the duration and date are colored in Red. These are the critical path tasks for your project.
If you have configured resources in your project, this button will perform the critical chain algorithms and optimize the resource utilization and availability for the fastest project completion.
Try some filters
We offer 4 filters to quickly review critical tasks, dependencies, sequences, blockers.
Add resources
The basic task information is present in the top box, double clicking on a task brings up the additional details box where you find extra information about the task. This is where we enter the resource needs, worst case / most likely durations or capture any daily notes regarding a task. To add a resource to a task, just click on the resource section and type in the resource name. (If you want to use resource availability to modify and optimize your schedule, ensure that the resources are listed on the resources page for your project. See the critical chain tutorial for more information).
Once the project is updated/synced, you can review the resource utilization by clicking on the resources button on the menu. This page lets you visualize how your resources are being used. Please see the Resources tutorial for a more in-depth review of this feature.
Setup the gantt charts
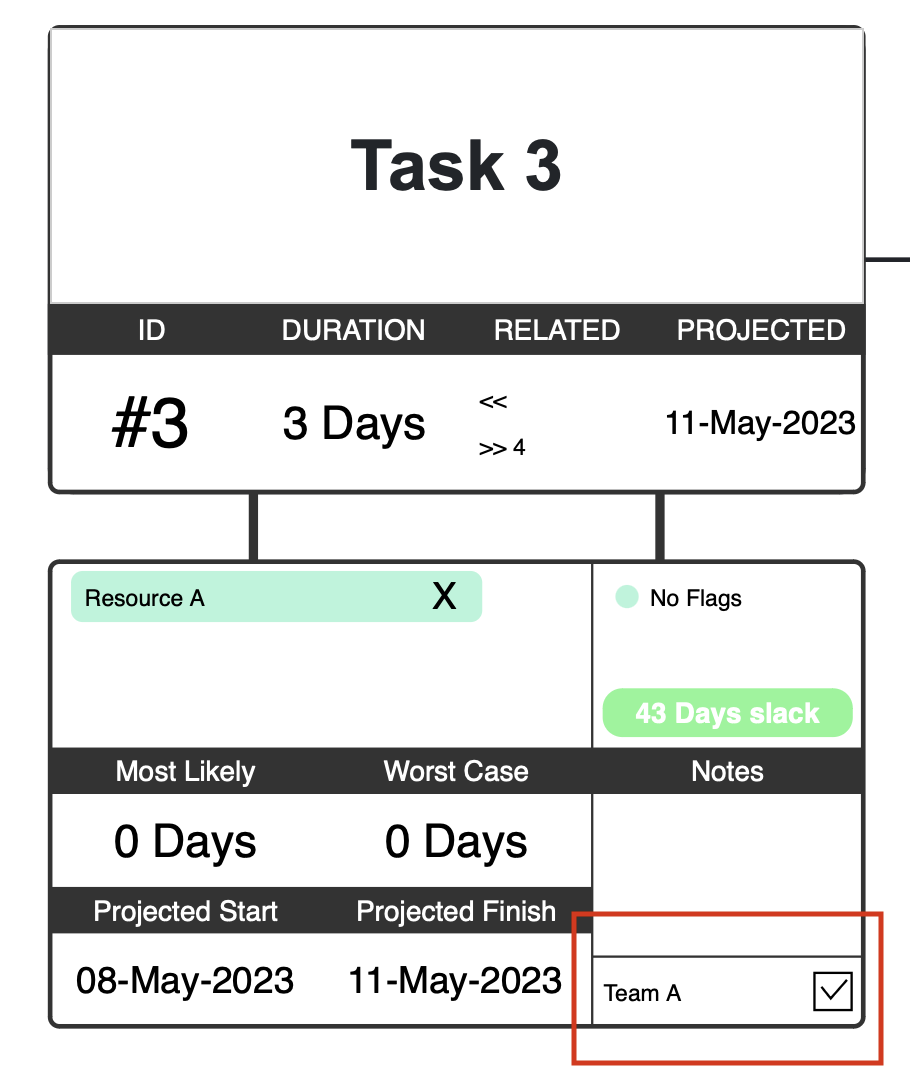
Setting up Gantt charts is simple, to view a task on the Gantt chart, simply select the checkbox in the bottom right of the second box as shown. To add a swimlane, just add the swimlane name in the box to the left (this example shows "Team A")
The menu bar section describes the other features available (search, saving pictures etc.); do check out our other tutorials for a more in-depth overview of some of our features.


Frequently Asked Questions
Any task has a range of possible durations, at Energer we express them in these three durations. Note that only the best case (on the first box) is required ; the other two durations can be left at the default. These durations are used for all project algorithms and buffer calculations to predict a completion date for your project.
Here's an example to give you a real world scenario, let's say your fastest commute to work is 20 minutes (imagine this being a weekend or a day with no traffic , non rush hour, you hitting all the green lights) this is what we would call, best case duration. Generally lets say with normal traffic, you take 30 minutes; this would be your most likely duration. Finally lets say there's a massive traffic jam, plus you might need to stop for gas; days like that, it might be 45 minutes, this is your worst case duration.
In this example, Energer's algorithms would plan your drive for 20 minutes, however, it knows that you'll probably take 30 minutes and thus adds the difference of 10 minutes as a buffer.
The undo/redo will remember all actions from a page load event; this means that any time you update/sync your project and the page reloads, the undo/redo resets.
The update/sync function runs multiple algorithms on your project data, the duration of execution depends on the complexity and size of your network. For most cases it should take less than 15 seconds, but for complex networks this can take a few minutes. .
Our free plan has a limit of 100 tasks; the Pro and Elite plans do not have any limits. For technical considerations (and to prevent misuse), there are soft limits; if you are working on a complex program and see our error message relating to such limits, please reach out to us so we can remove any restrictions for your project.
At this moment, we do not offer these constraints. Please check out our backlog to see the priority of feature requests or to request additional features.
Most of these constraints can be setup using additional tasks on the network, please reach out to us for recommended workarounds.
Some of the algorithms used are non-deterministic , which means they do not have only one solution, Energer looks for the most optimum solution for scheduling tasks, it is possible in some cases that the algorithm found two different paths ending up with different project dates for interim tasks.